
Instant Pot Shrimp biryani (or prawn biryani) is a delicious one-pot biryani made with long-grained aromatic basmati rice layered with prawns. A delicious meal that can be made in under 30 minutes!

Jump to:
I’ve said it several times before, biryani is a top qualifier for my favorite meal ever! What’s not to love about a one-pot rice and meat dish, flavored with spices, fresh mint and coriander, onions and enriched with raisins and cashews? This shrimp biryani is absolutely a feast and can be enjoyed as a meal in itself.
The best part of this prawn biryani recipe is that you can make it under 30 minutes in an Instant Pot (or any pressure cooker). Once you make biryani in the Instant Pot, you really won’t be looking back. One of my favorite biryani recipes is Instant Pot chicken biryani, a one-pot dish made in the Instant Pot. For a more traditional, authentic recipe for biryani, look up my recipe for Chicken Dum Biryani.
Shrimp biryani easier to make than chicken biryani - it has lesser cooking time, as shrimp quicks real quick. Pair this recipe with some Raita for biryani, and you will have the perfect meal! If you are a beginner interested in trying out Indian recipes, this recipe is definitely for you!

Why This Recipe Works
- 30 minutes only!
- One-pot recipe made entirely in the Instant Pot or pressure cooker
- Full of flavor, authentic taste of traditional Indian prawn biryani
List of Ingredients
To make shrimp biryani, you will need:
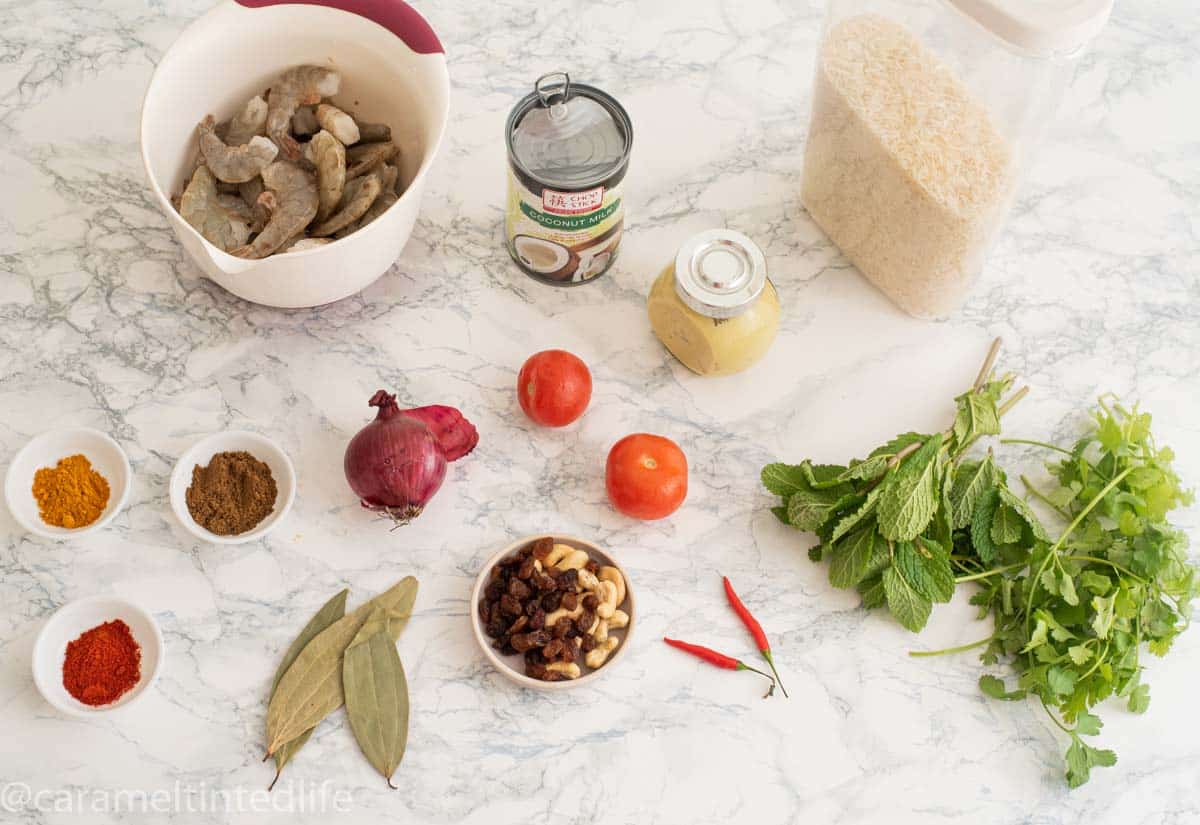
Rice - Use long-grained Basmati rice for best results. Basmati rice is the ideal rice for making biryani.
Shrimp (Prawns) - Use fresh of frozen (thawed) shrimp that has been deveined and shelled. Do not use pre-cooked shrimp for this recipe.
Spices - Garam masala, turmeric powder, Kashmiri red chili powder, whole bay leaves, bird's eye chilies or green chilies. For more on Indian spices and how to use them, read my handy guide on Indian spices.
Ginger garlic paste - Ginger garlic paste is a tenderizer and is used in many Indian recipes, from curries to appetizers. You can also use finely minced ginger and garlic instead of the paste.
Onion and tomatoes - Red onions work best. Tomatoes can be substituted with canned tomatoes.
Coconut milk - I used canned coconut milk for this biryani, you can use homemade coconut milk as well. This is an important ingredient for that authentic taste of prawn biryani. Be sure to use coconut milk and not coconut cream.
Mint and coriander/ cilantro - Fresh mint and cilantro are important ingredients for making biryani. They add an unmistakable flavor to biryani and should not be skipped!
Step-by-Step Instructions
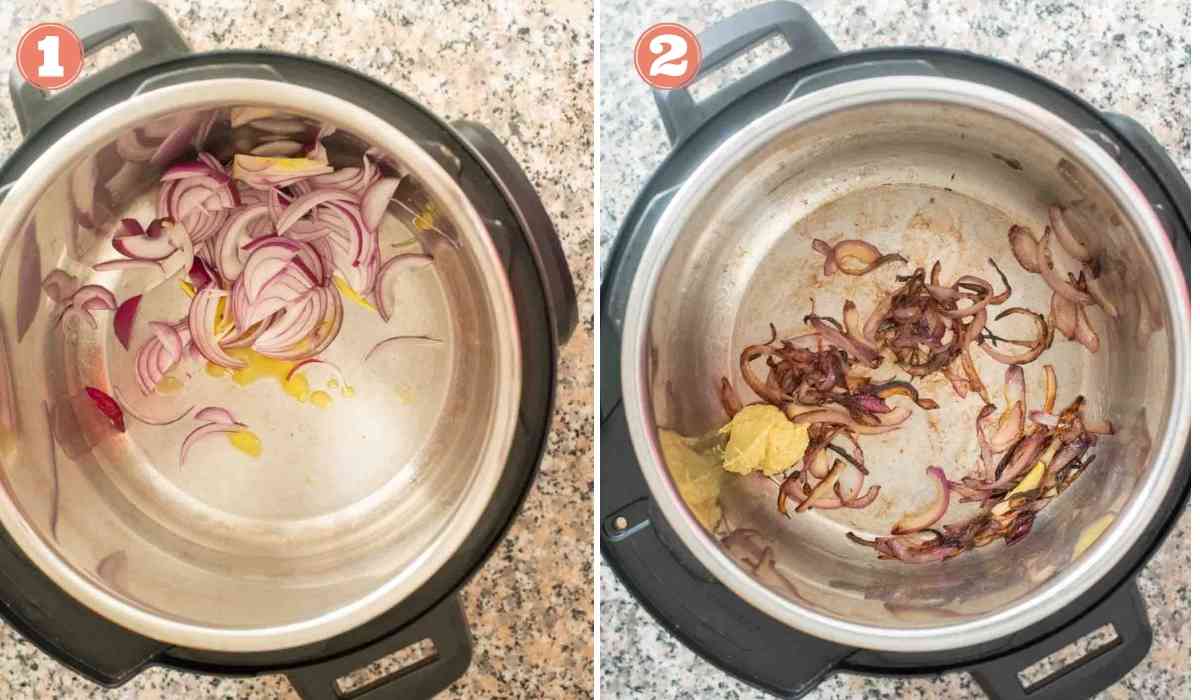
Start by setting the Instant Pot to 'Saute' mode. heat the ghee and add the onions. Once the onions turn brown, add the ginger garlic paste.
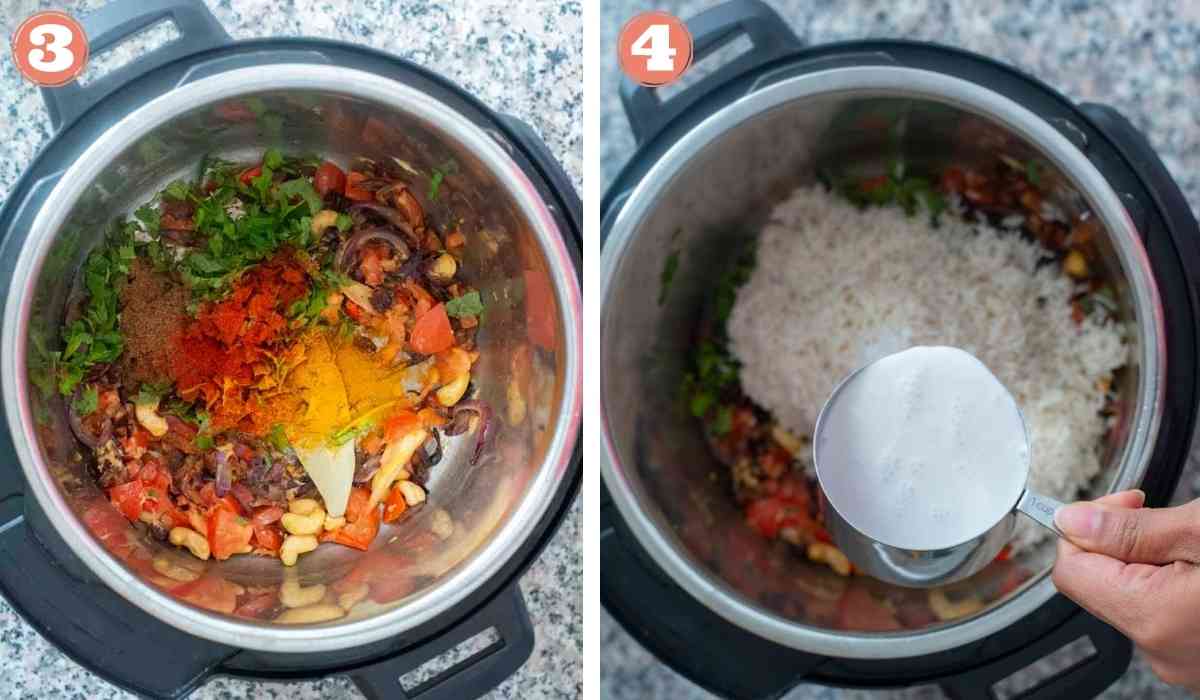
Add the Raisins and cashews, green chillies, bay leaves, chopped tomato, fresh mint and coriander. Saute for a minute, then add the spice powders, bay leaves. Deglaze the Instant Pot with 1 tablespoon water. There should not be any residue stuck to the base, else the Burn error will be triggered.
Hit Cancel to turn off the IP, add the rice, followed by coconut milk and water. Mix well to combine all ingredients.
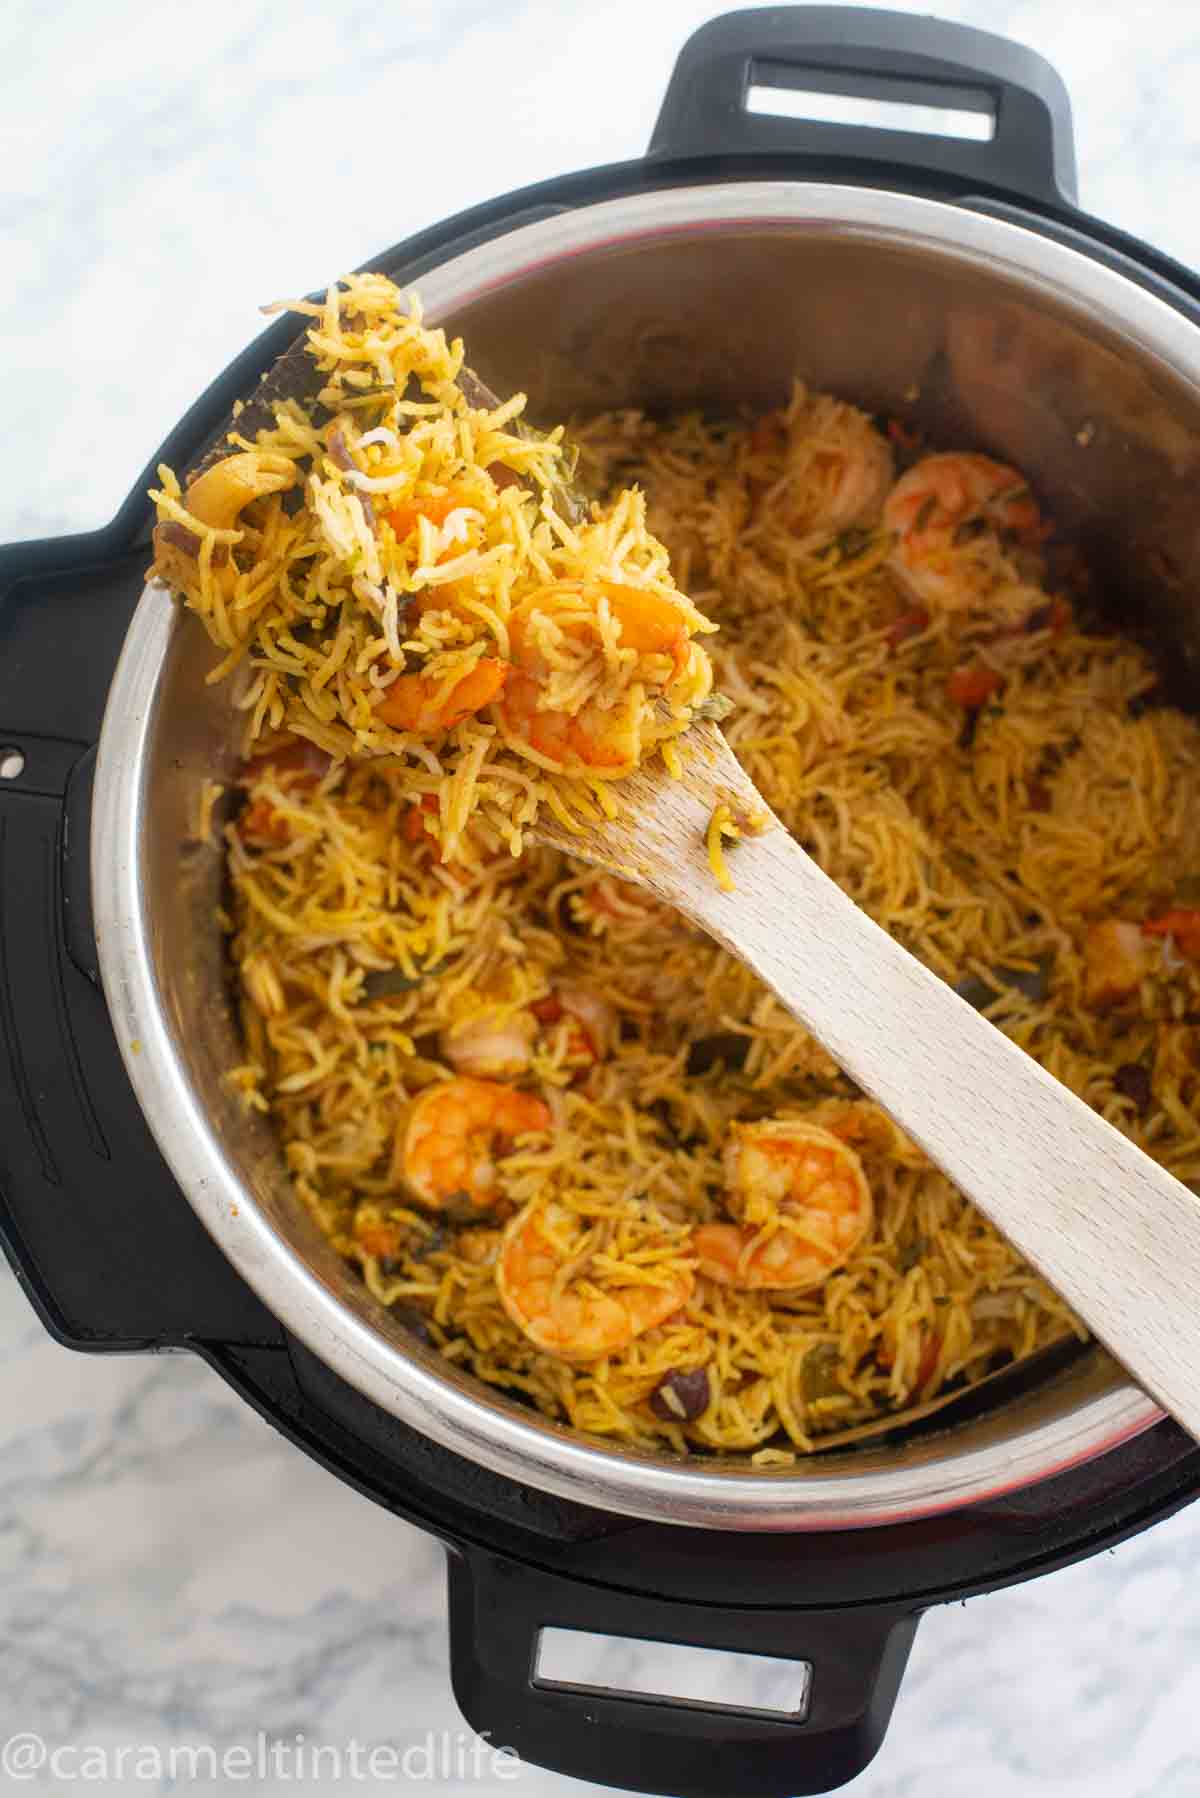
Add the shrimp and salt, close the lid of the Instant Pot, and set it to pressure cook, for 5 minutes.

Once the cooking cycle is complete, the Instant Pot will beep. Let the pressure release by itself. Once the pressure valve drops, open the lid of the Instant Pot and serve the shrimp biryani.
Expert Tips
Avoid the Burn Error on the Instant Pot - The Instant Pot is sensitive to any residue that may be stuck to the base of the pot, and the 'Food Burn' error message ca n be easily triggered. To avoid this - make sure you deglaze the pot before pressure cooking and avoid using thick coconut milk - thick liquids will not allow the Instant Pot to come to pressure.
Use Coconut Milk for authentic flavor - I make my shrimp biryani with coconut milk, instead of yogurt which is typically used in chicken biryani. Coconut milk gives the biryani an authentic taste of traditional classic prawn/shrimp biryani.
Brown the Onions: Sauté the onions, until lightly brown – biryani isn’t complete without onions. Traditional biryani recipes call for deep-fried (until crisp) onions to add flavour in the dish. In this version, I sauté them until brown.
Garam Masala: Garam masala is key to so many Indian dishes and I can’t stress on this one pantry essential enough! I make my own garam masala, but you could use store-bought garam masala as well.
Basmati Rice: Use long-grained Basmati rice for best results. I like to soak the rice in water for at least 30 minutes before I add it to the Instant Pot, as this helps in keeping the rice grains intact and prevents them from breaking. Drain the water before you add the rice.
FAQs
This depends on the type of rice you are using. For biryani, you should use basmati rice - which takes 5 minutes on the Pressure Cook cycle. Let the cooking cycle complete and let the pressure release naturally before you take out the rice.
Yes, you can freeze prawn biryani in the freezer. Make sure you let the dish come to room temperature before you freeze it. Transfer the biryani into freezer-safe containers and freeze as you would normally do.
Shrimp biryani is a one-pot meal that tastes amazing on its own! II do recommend that you serve it with a side of raita for biryani (spiced beaten yogurt) or Indian pickle or even green chutney.
More Instant Pot Rice Recipes

Instant Pot Shrimp Biryani
Equipment
Ingredients
- 500 grams shrimp Fresh or frozen (If frozen, thaw before using)
- 1.5 tbsp ghee or use butter
- 1 onion sliced thin
- 1 tbsp ginger-garlic paste
- ½ cup raisins and cashews
- 2 green chillies or use bird's eye chilies
- 3-4 bay leaves
- 2 tomatoes diced
- ½ cup chopped fresh mint and coriander
- 1 tsp red chili powder Use Kashmiri red chilli powder for best results
- ¾ tsp turmeric powder
- 1 tsp garam masala see notes
- 1 cup coconut milk
- 2½ cups basmati rice
- 1 ¾ cups water
- 1 tsp salt to season
Instructions
- Soak the basmati rice in water for 30 minutes. After soaking, drain the water and rinse the rice before using it.
- Turn the IP to 'Sauté' mode. Add the ghee, followed by the sliced red onions. Sauté until the onions begin to brown.
- Add the ginger-garlic paste, followed by the raisins and cashews, green chillies, bay leaves, chopped tomato, fresh mint and coriander.
- Sauté until the tomatoes release their moisture and start to soften (around 1 minute).
- Add the red chili powder, turmeric and garam masala and stir to combine with the rest of the ingredients.
- Important: Deglaze your Instant Pot with a tablespoon of water, to make sure there is no residue sticking to the bottom of the pot. Any residue will trigger the Burn error.
- Add the basmati rice. Give it a good stir to combine.
- Add the coconut milk and mix well.
- Add 1 ¾ cups water and mix well.
- Add the shrimp, followed by the salt and mix well to combine.
- Put on the lid of the IP, and with the valve in 'sealing' position, switch to 'Manual' mode, in 'High' setting. Set the time for 5 minutes.
- Let the biryani pressure cook, and let the steam release naturally (do not open the valve to release steam, let the vent go down on its own) for 10 minutes. Then, lift the vent to release any residual steam.
- Open the lid of the IP and gently fluff up the biryani with a fork.
Serving Suggestion
- Serve with a garnish of coriander, wedges of lemon, and raita (spiced yogurt) on the side. You can also serve the biryani with Indian pickle or green chutney.
Video
Notes
- It is important to deglaze the Instant Pot before pressure cooking - any residue stuck to the base of the pot will trigger the burn error.
- Ginger garlic paste can be substituted with minced fresh ginger and garlic
- Fresh tomatoes can be substituted with 1/3 can of tomatoes.
- To make garam masala: In a pan on the stovetop, dry-roast (without oil) the following spices: ½ cup fennel seeds, 5-6 cardamoms, 6-7 cloves, a 2 inch piece cinnamon, 2-3 pieces of mace. Once the spices are heated, grind them in a high power blender, or coffee grinder. Store the ground spice mix in an air-tight jar and use as needed.
I had 0 luck with this. I got multiple burn warnings even after deglazing the pot multiple times (including literally taking everything out and scrubbing it clean and then putting everything back in with more liquid). I ended up having to add almost 5 cups of additional liquid and even then I still got burn warnings so I gave up and put it on sautee for a few minutes to get it simmering and then just put the lid on to steam it for a while so the rice would continue to cook. I followed the instructions exactly so I have no idea why this turned out to be so difficult.
I'm sorry that this happened, I'll be remaking this recipe and testing it again in a new IP (I used an older version of the IP to make this recipe). I'm not sure why there was a burn error even with the added 5 cups of water? The best way to avoid a burn notice is to ensure the pot is deglazed + have enough liquid to cover the ingredients. A tip is to add a couple of tablespoons of water while deglazing. Few common reasons why the burn notice can get triggered - Less liquid, thicker liquids and sauces, pot not correctly deglazed, newer versions of the IP are also more sensitive than older versions of the IP. Thank you for your feedback
Absolutely delicious and easy. Thank you for sharing. My husband was wowed. My instant pot also did not do the countdown of 5 minutes because maybe I had less water. It does that often so I just countdown 5 minutes after the pin goes up. 🙂
thank you so much for the feedback! I hope you make it again!
Have you made this with brown rice?
What do I do if the burn warning comes on?
This can happen if the amount of liquid is too less or the pot has not been deglazed while cooking. You turn off the IP; can add water, deglaze the pot and continue cooking.
if i use yoghurt instead of the coconut milk, how much should I use?
Hi,
Can you confirm if the cup measurement used is the cup that came with the IP?
thanks, annett
Hi Annett, yes this is the cup that came with the IP!
I tried this recipe . It came out perfectly and it’s extremely easy but yet very yummy. Everything was ready to go within 10 mins including the prep work (I soaked the rice 30 mins prior as well)
Thank you so much, Gayatri! So glad you liked it and dropped a review!