![]()
In my last post I mentioned baking these salt dough ornaments with my three-year old. They were such a breeze to make ! We spent most of our Sunday rolling out salt dough, cutting out the decorations using cookie cutters and painting them, and in the process, our hands, and clothes as well.
We made our first salt dough ornaments last year, all of which found their way to our tree this year. Making these ornaments is quite literally child's play. My toddler was thoroughly engaged last year, when he was two and this year, he had a hand (literally!) in everything. Not only are they incredibly fun to make, at the end of the day you have cute ornaments that last long, make great keepsakes, and make excellent personalized gifts as well. We baked another batch later in the week, for gifting pre-school teachers and friends.
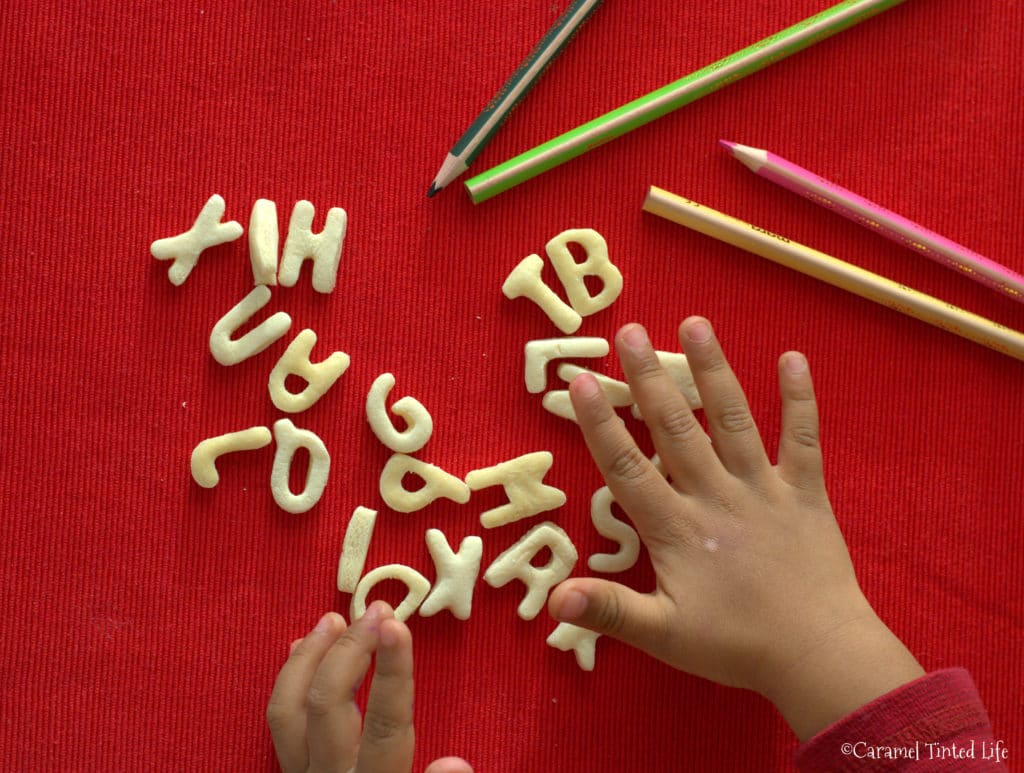
We also gathered all the little leftover dough, and used alphabet cutters to make salt-dough alphabets!
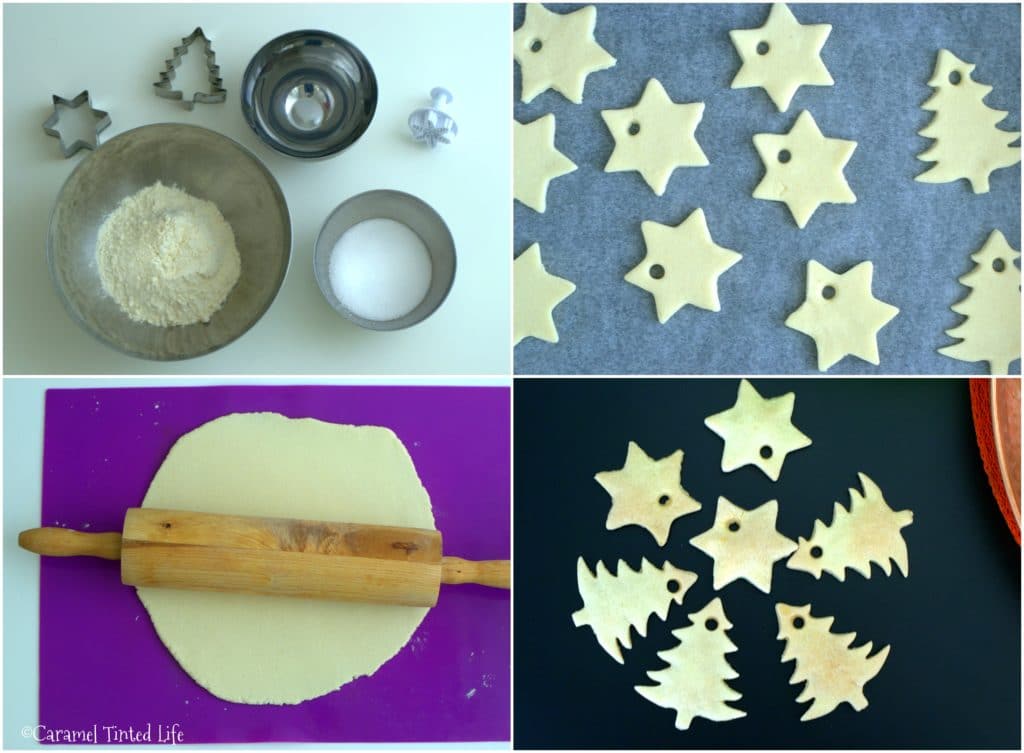
Making these salt dough ornaments is so simple, calling it a recipe is making it sound more complicated that it is. We used all-purpose flour and table salt in a ratio of 2:1. Add just enough water to make a dough, 1 part water works fine. Once the dough is formed, roll it out and pick your favorite cookie cutters to stamp out shapes. Make sure you use a straw to stamp out a hole near the top of each ornament. Bake them at 180C for 30 minutes, turning them over midway.
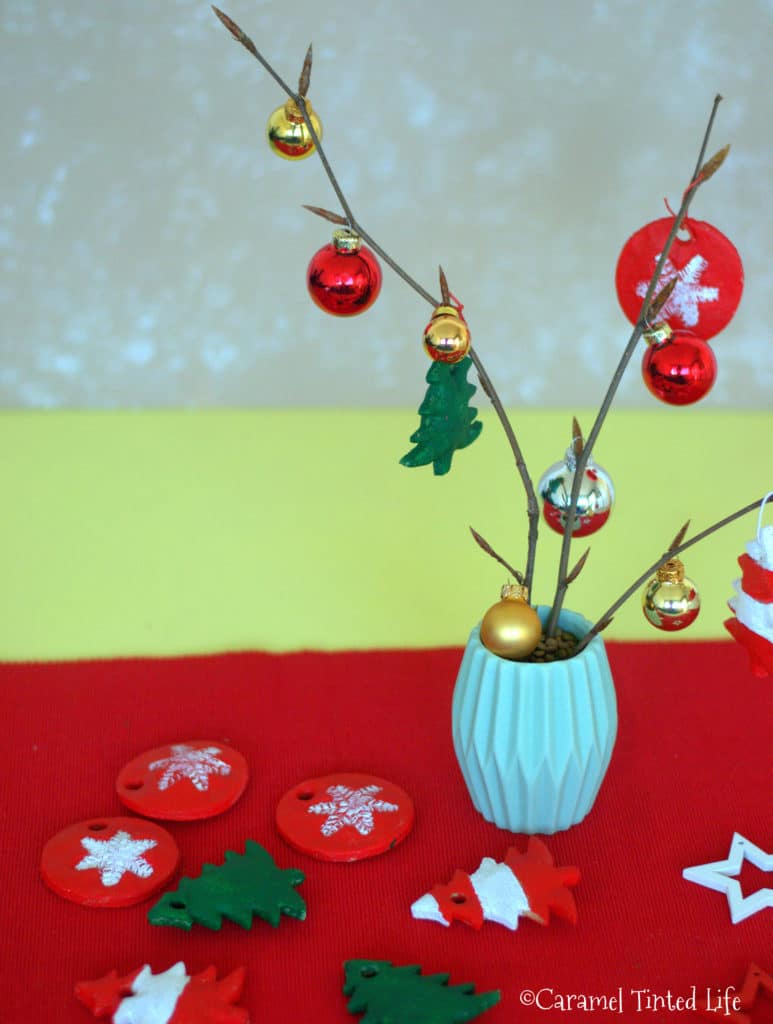
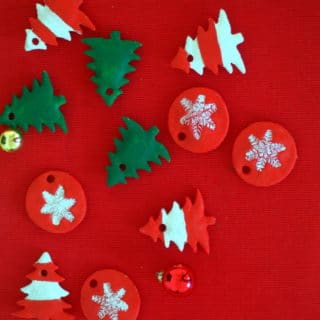
Let your toddler paint them with toxin-free acrylic paint and let the paint dry. Add glitter for a festive sparkle if you'd like! The toddler painted the base coat for the ornaments and I followed with a top coat for most of the ornaments. Ideally, for better preservation, finish off with a final coat of clear sealer.
Our ornaments from last year stayed well, kept in a zip lock bag, so I'll be doing the same this year as well. If you would like to share tips on salt dough ornaments, I'd love to hear them!
Salt Dough Ornaments
Ingredients
- 2 cups all purpose flour
- 1 cup salt regular table salt
- 1 cup lukewarm water
- 1 straw
- Cookie cutters
- Non toxic acrylic paints
- Parchment paper/ Baking paper
Instructions
- Keep a baking sheet lined with parchment paper ready
- Mix together the flour and salt in a large mixing bowl
- Add the water very slowly, a little at a time, mixing it with the flour, until incorporated
- Bring the dough together and knead it (just for a couple minutes) until smooth
- Dust a little flour, on a work surface, and use a rolling pin to roll out the dough until it is 1/4 th inch in thickness
- Cut out shapes using cookie cutters and transfer them to the baking sheet
- Using a straw, cut little holes in the shapes close to the top of each ornament
- Transfer the baking sheet to an oven and heat at 180 C for 30 minutes, turn over midway
- After 30 minutes, check to see if the ornaments are completely dried out, if they still have some moisture, bake for an additional 5 minutes
- Take out the ornaments and let them cool down
- Paint with non-toxic acrylic paint, and add embellishments such as glitter if you'd like
- Once dry, knot a string through the hole in the ornament and hang it up on your tree!
Notes
2) You could try making scented play dough by adding essential oils while preparing the dough. Holiday scents such as peppermint, orange or cinnamon would make your house smell like Christmas

If you like this, do pin here for later:

Is it possible to add more oil to the ornament in the years following? This way the smell is always fresh and easily smelled, or would you need to remake each year snd add your oil?
Loved the suggestions! Thank you!!